
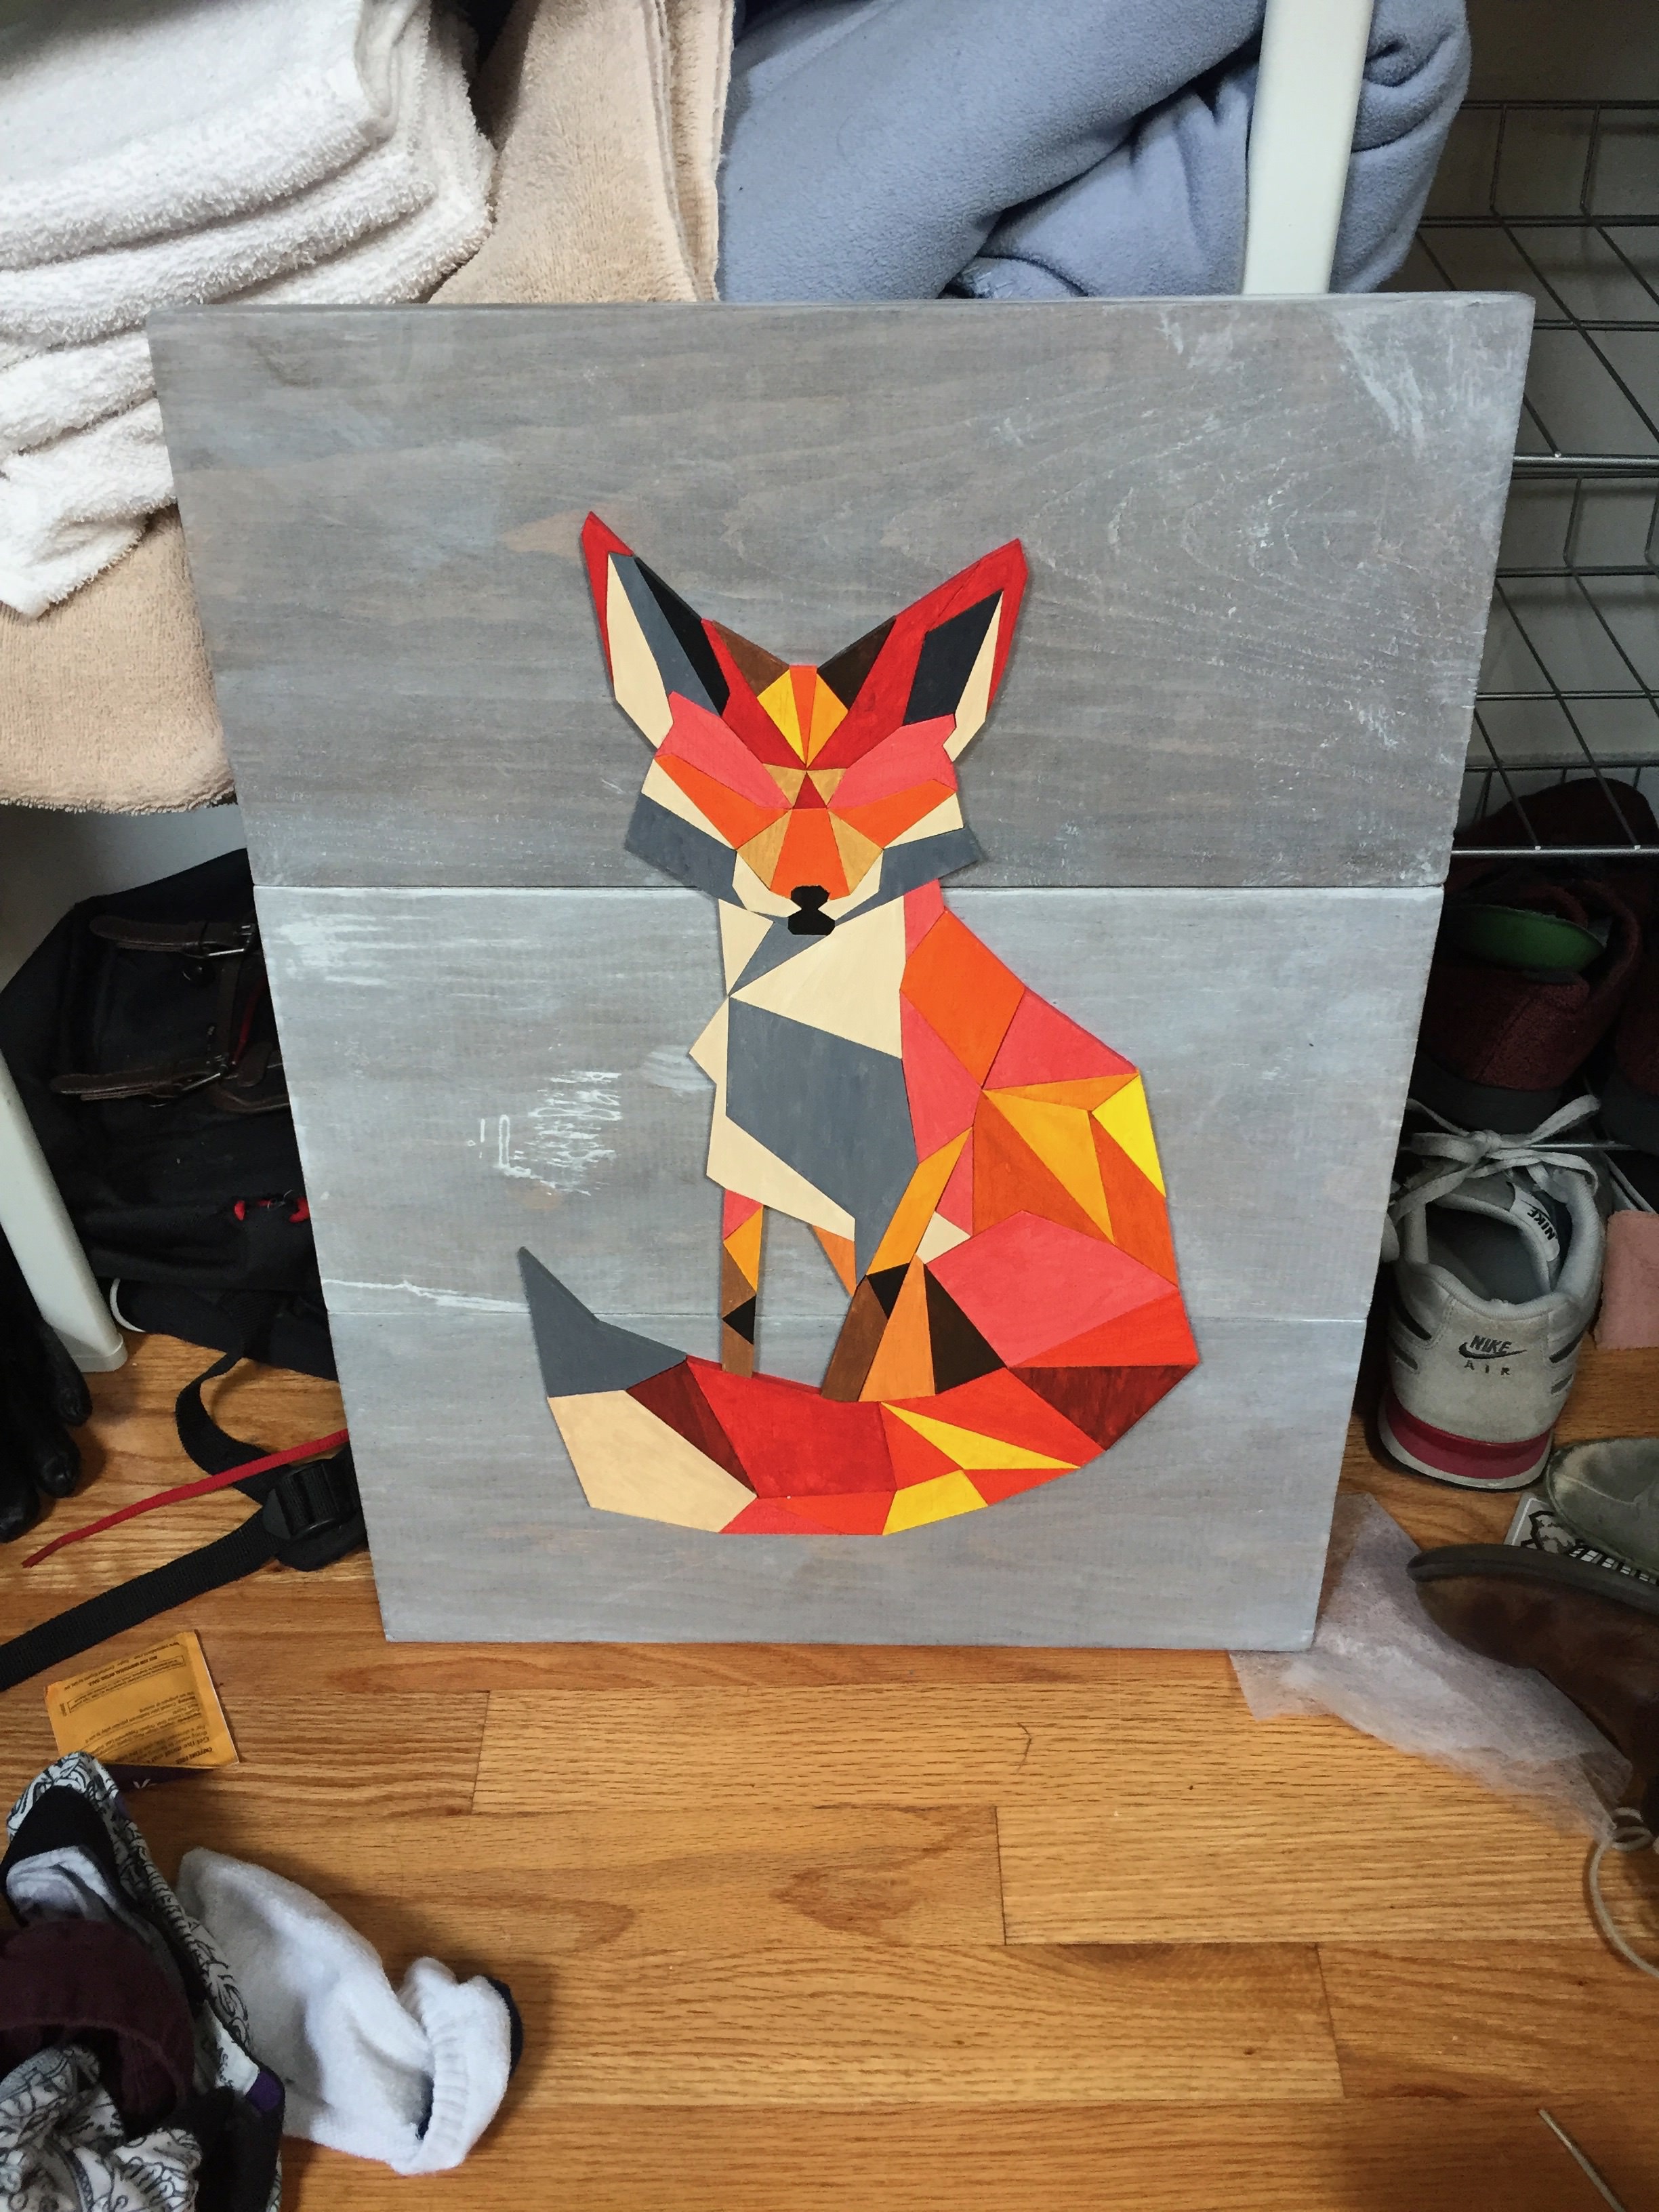
Low Poly Fox
A laser-cut wood portrait of a low-poly fox.

DIY
Laser Cutting
Intro
As a frequenter of r/diy I have seen several submissions of wooden low poly art. Low poly art is a class of artwork that renders real-life images (usually of nature or animals) as a collection of distinct polygons and complementary colors. One day I found this low poly rendering of a fox and convinced myself that I had to take a stab at creating a wooden version of it.

Project Overview
This is the outline for the project:
- 1. Create an outline of the fox in Inkscape.
- 2. Use the outline to laser cut the fox out of wood.
- 3. Paint the wood to match the digital image.
- 4. Build a wooden background and stain it white.
- 5. Glue the fox onto the wood background.
Step 1: Vectorize
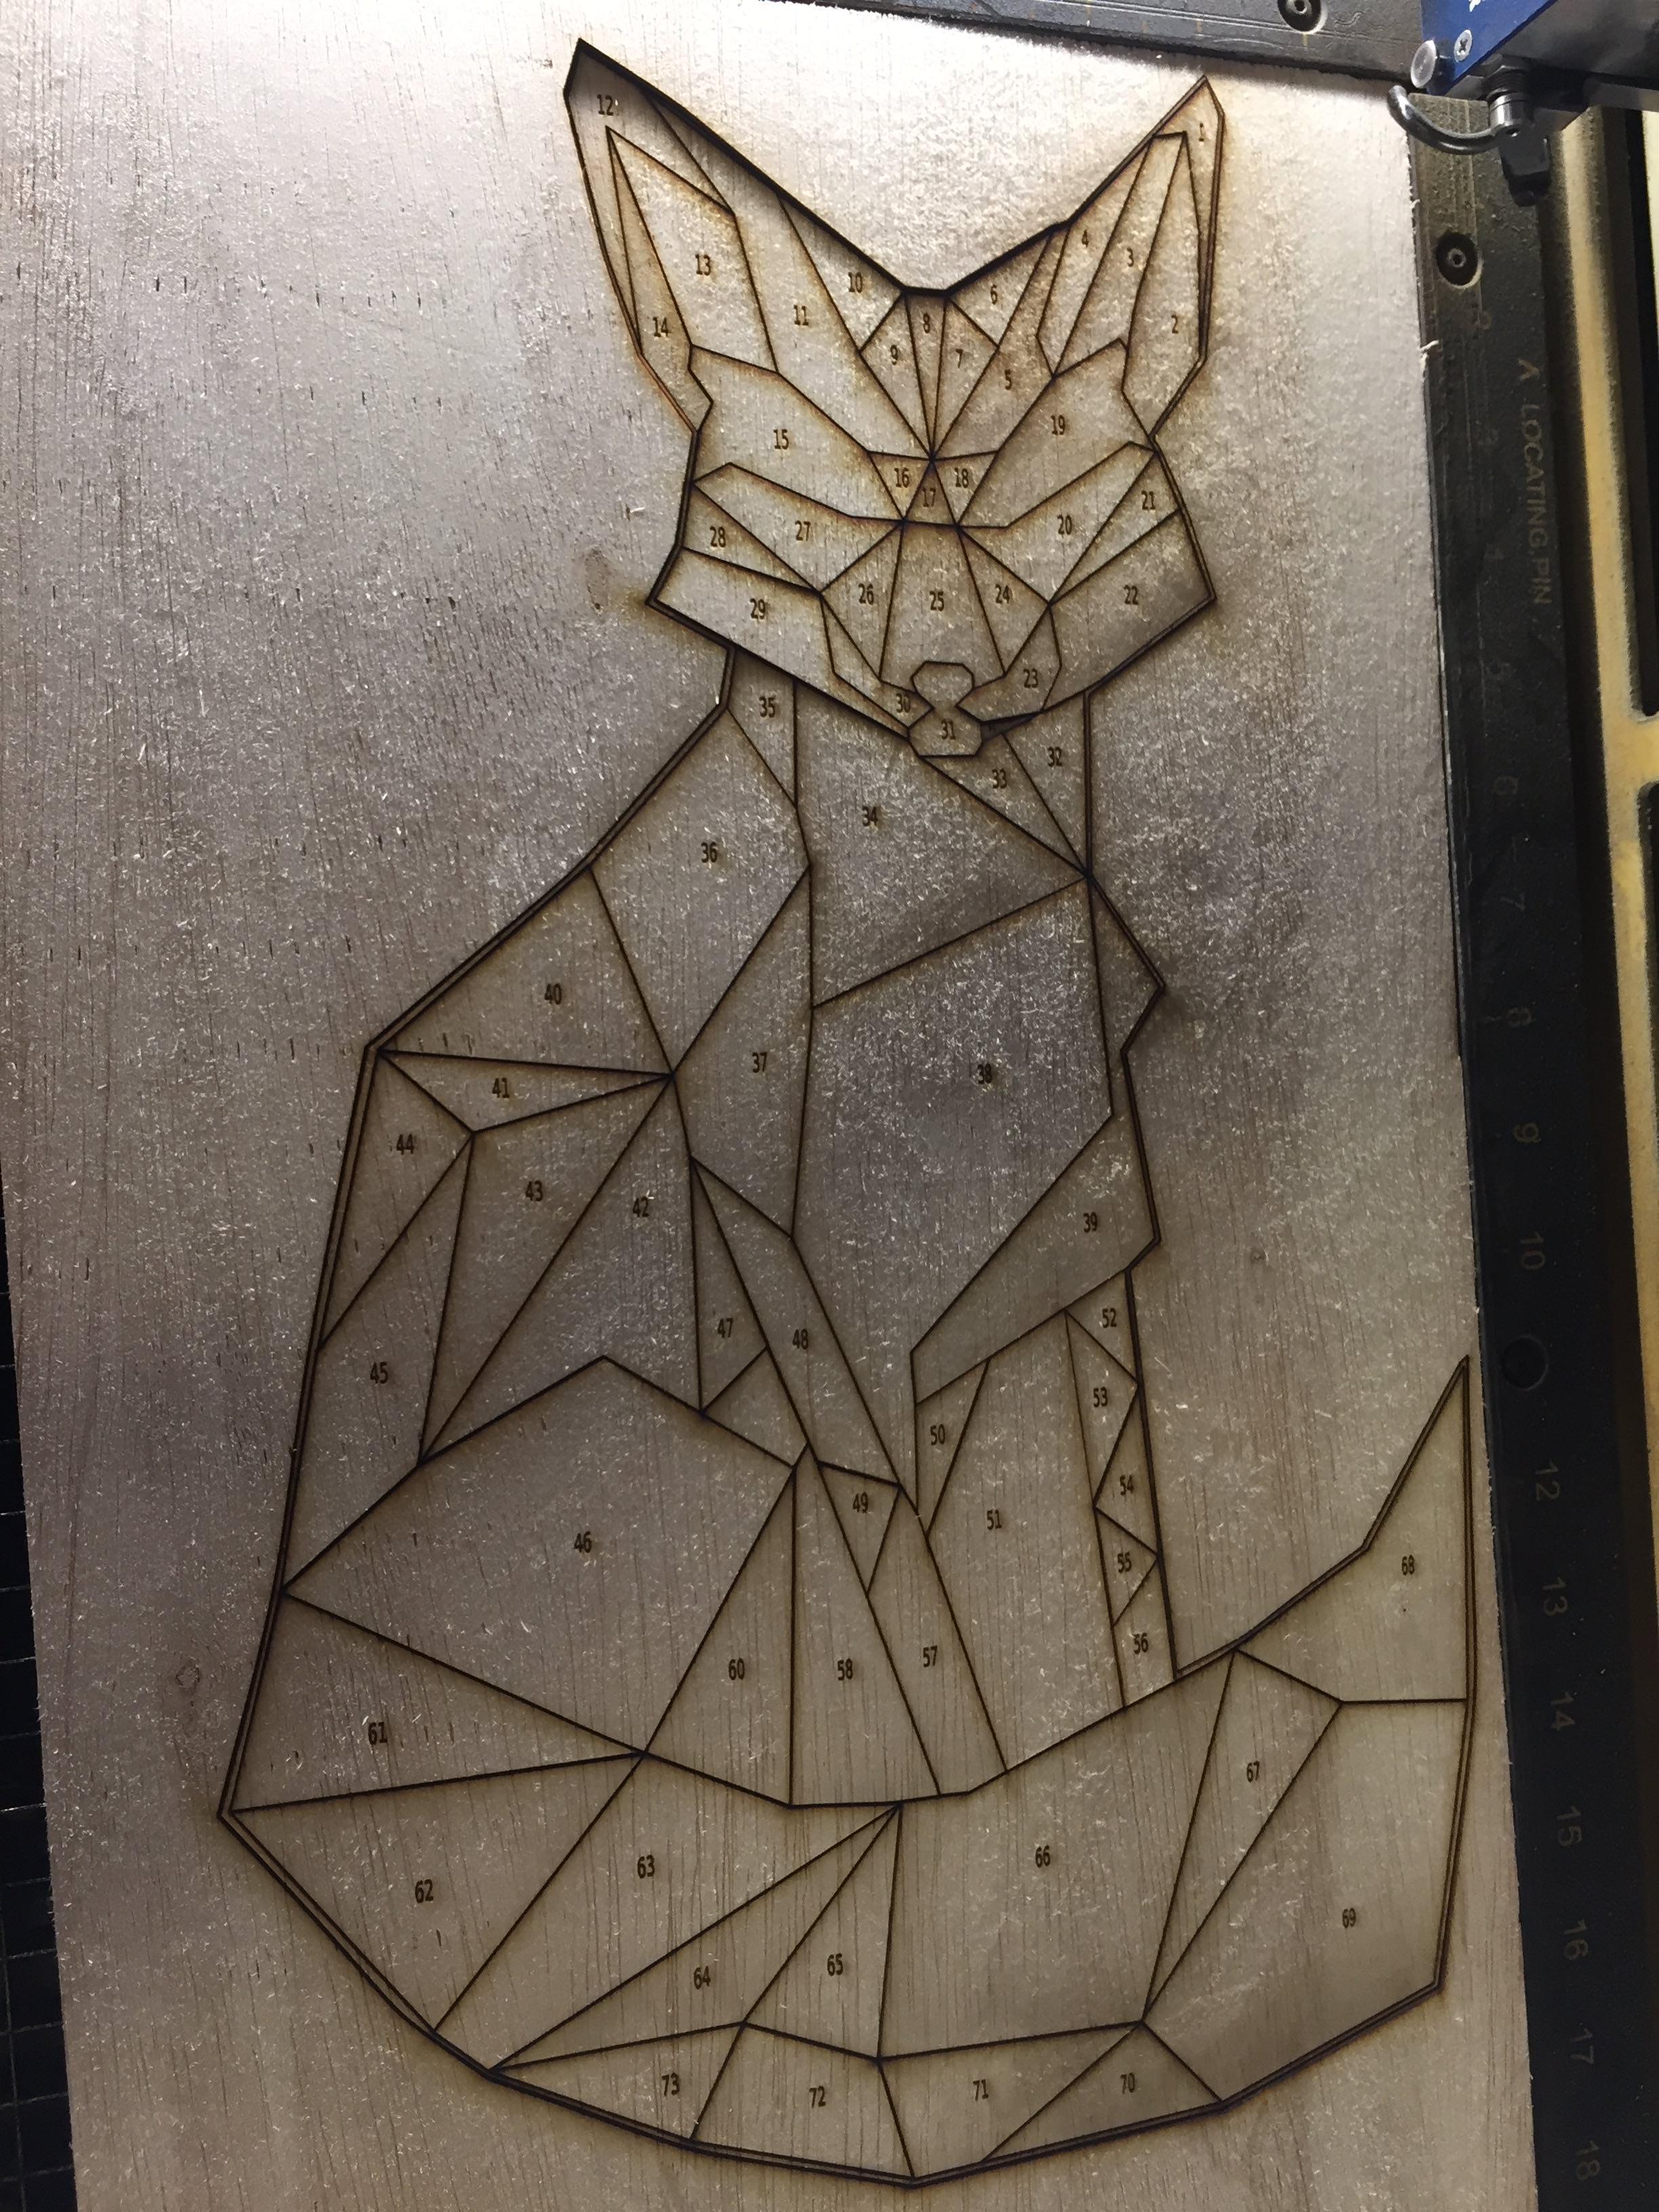
I first loaded up this image into Inkscape, a photo editing software. I proceeded to outline all the polygons using the pencil tool. I also added numbers to each tile. This will prove to be very useful later on.

Step 2: Laser Cut
Through my work, I have access to a laser cutter for free! I picked up some one-dollar scrap wood from Home Depot that worked perfectly for my needs. I cut out the edges of the outline and etched the numbers into the wood. The numbers made it much easier to re-assemble my fox once I painted it.
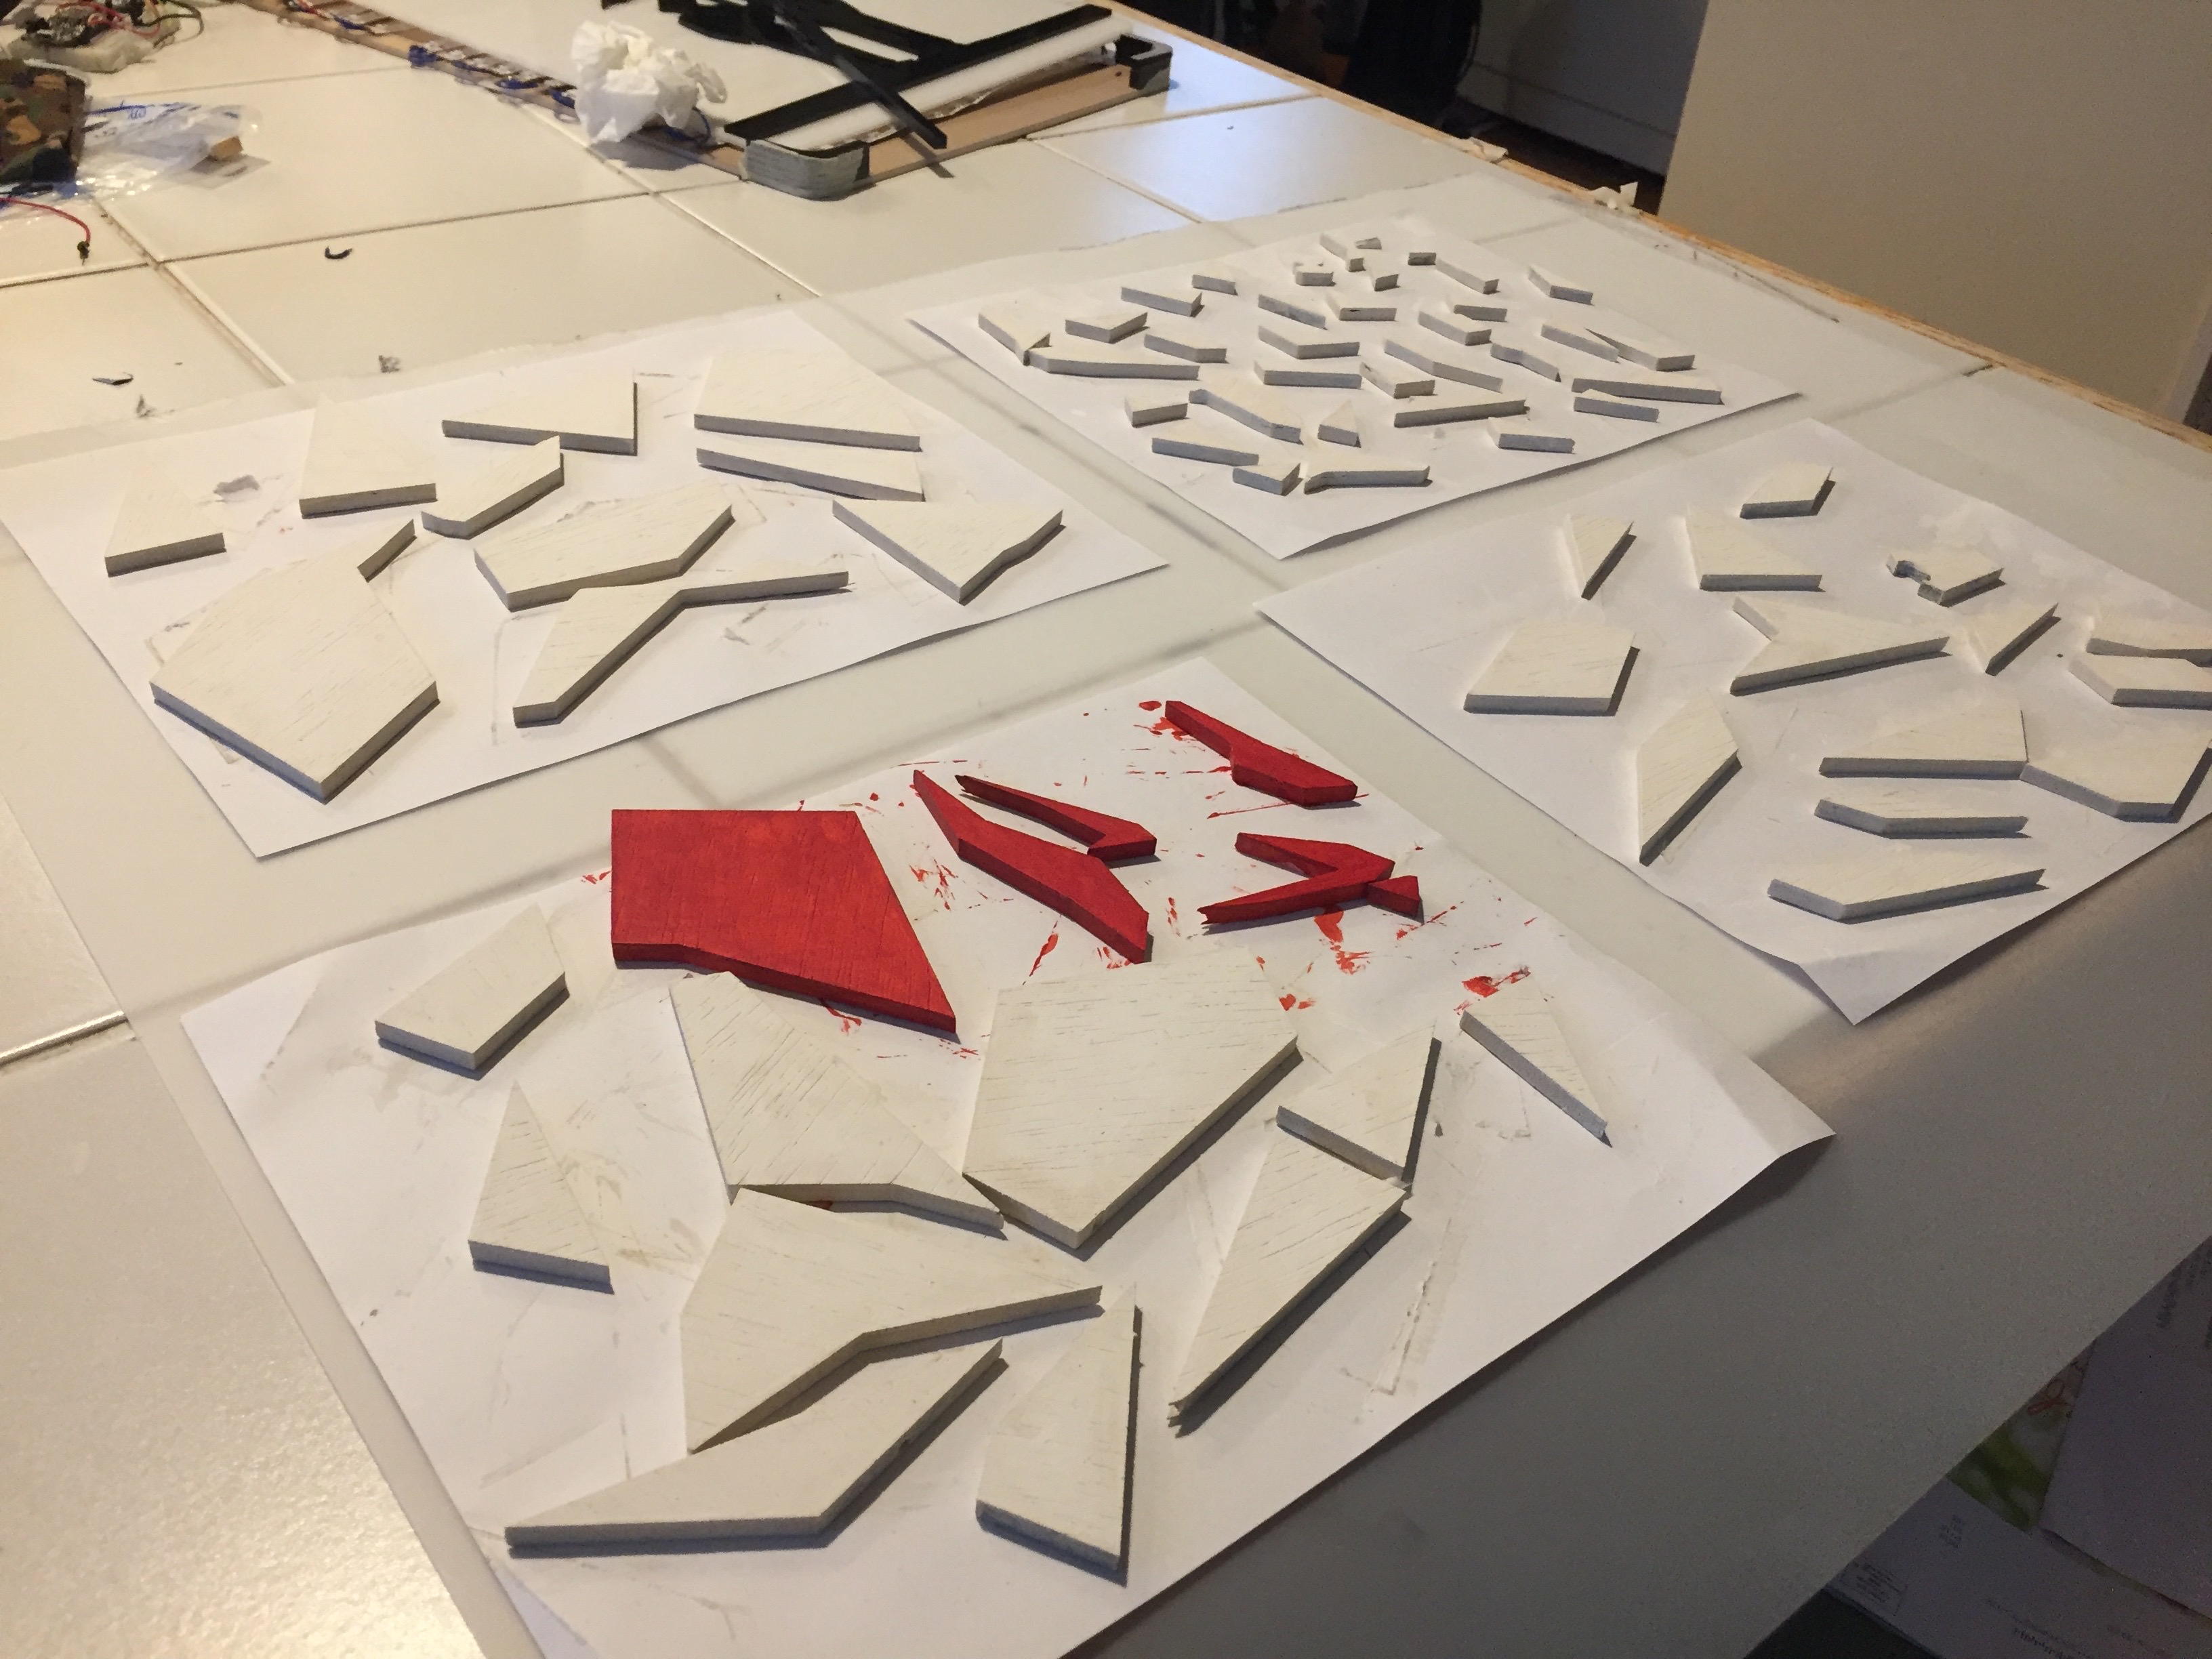
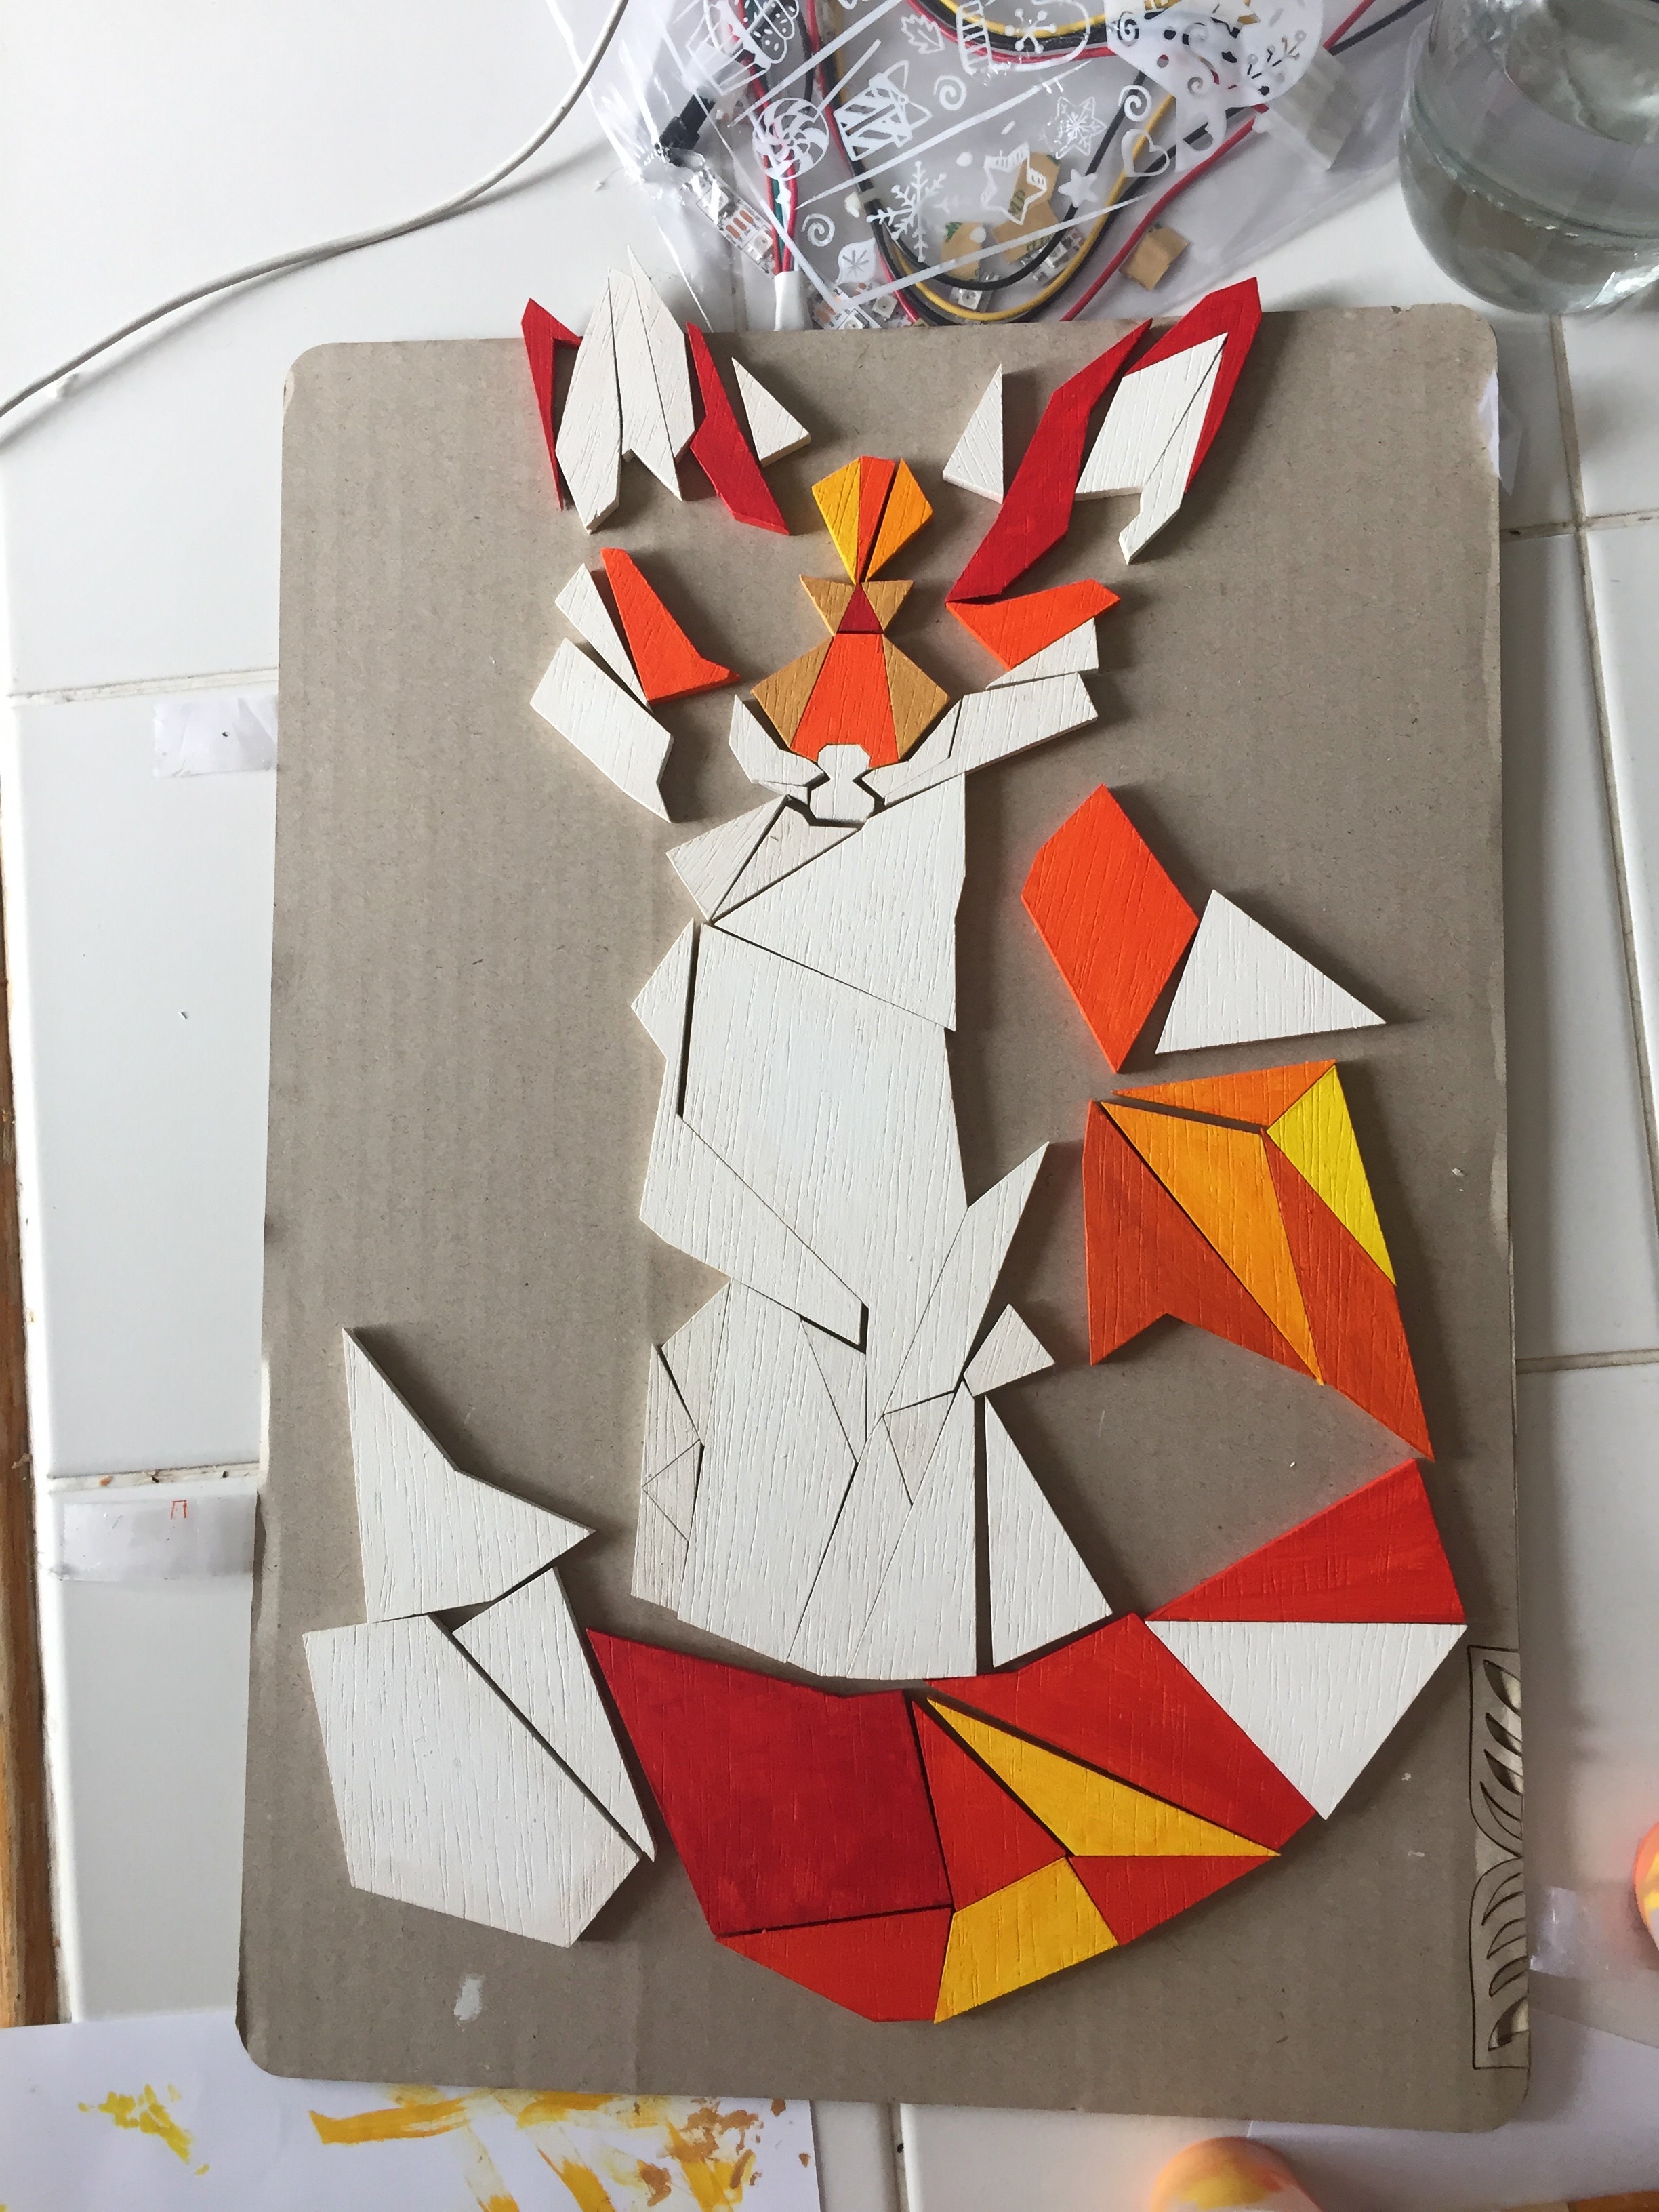
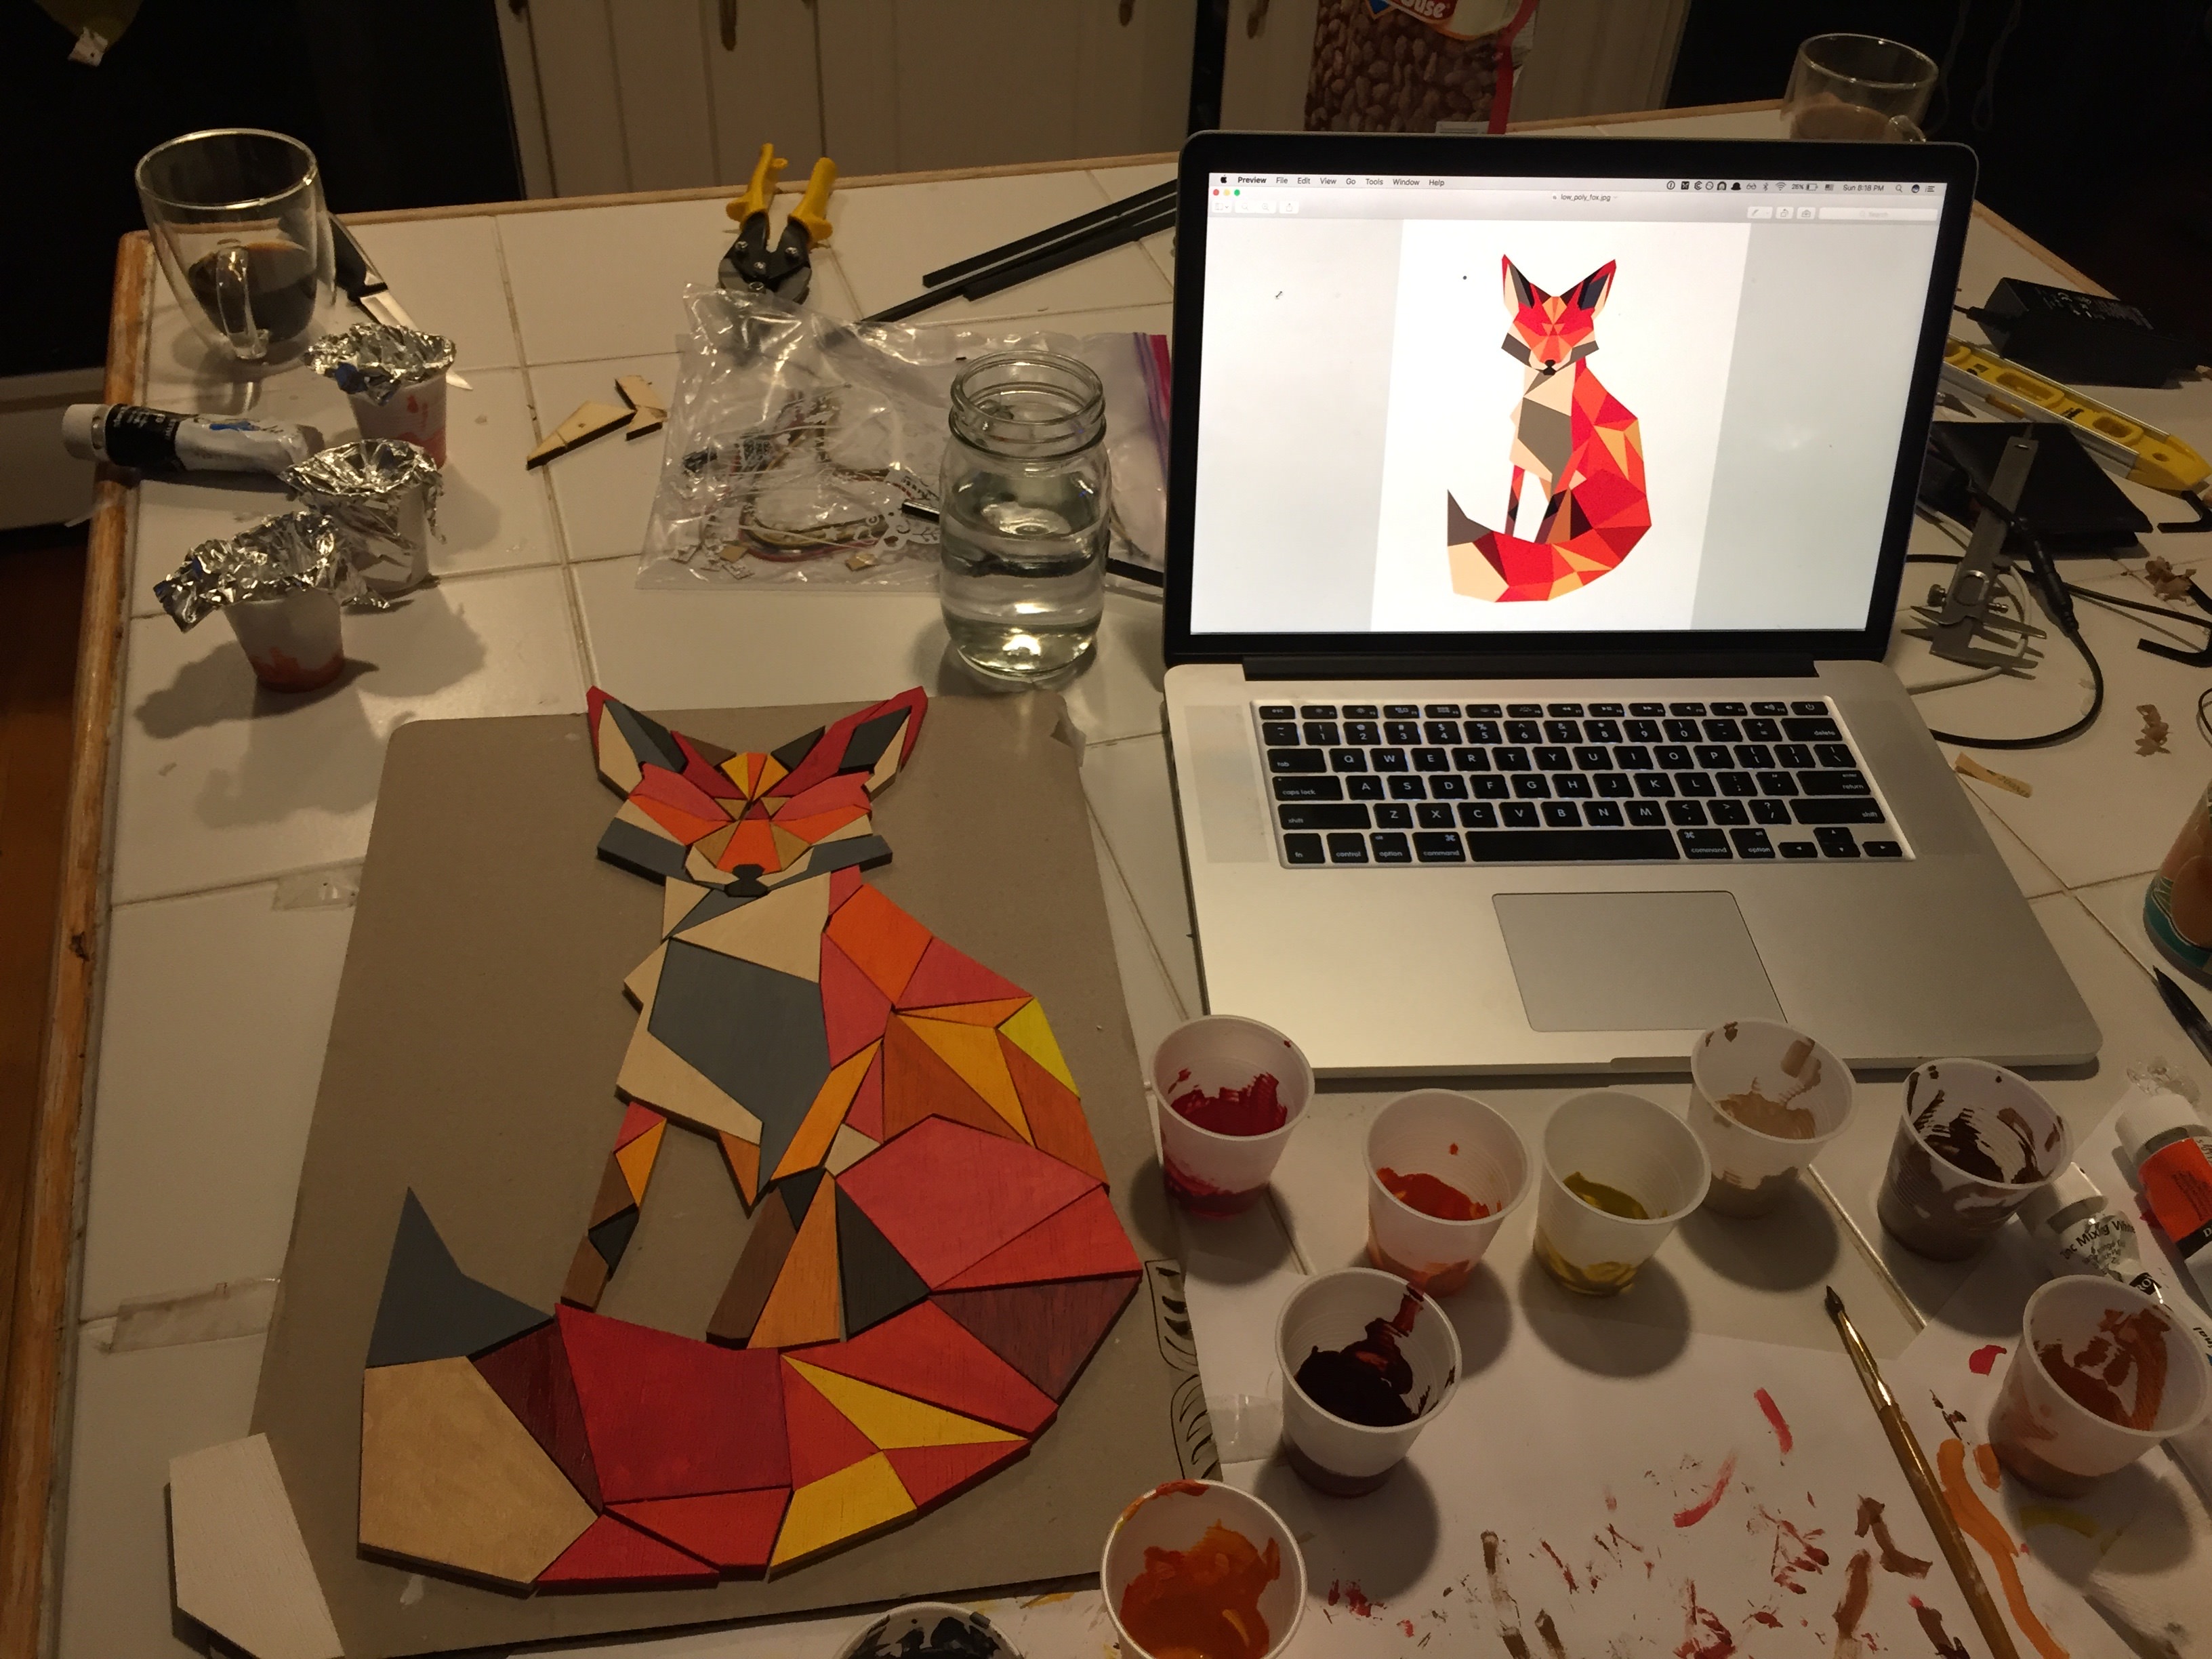
Step 3: Painting
This was the most time-consuming part of the process. I first did two coats of primer, then one to two coats of paint. I used acrylic primer and paint for this.
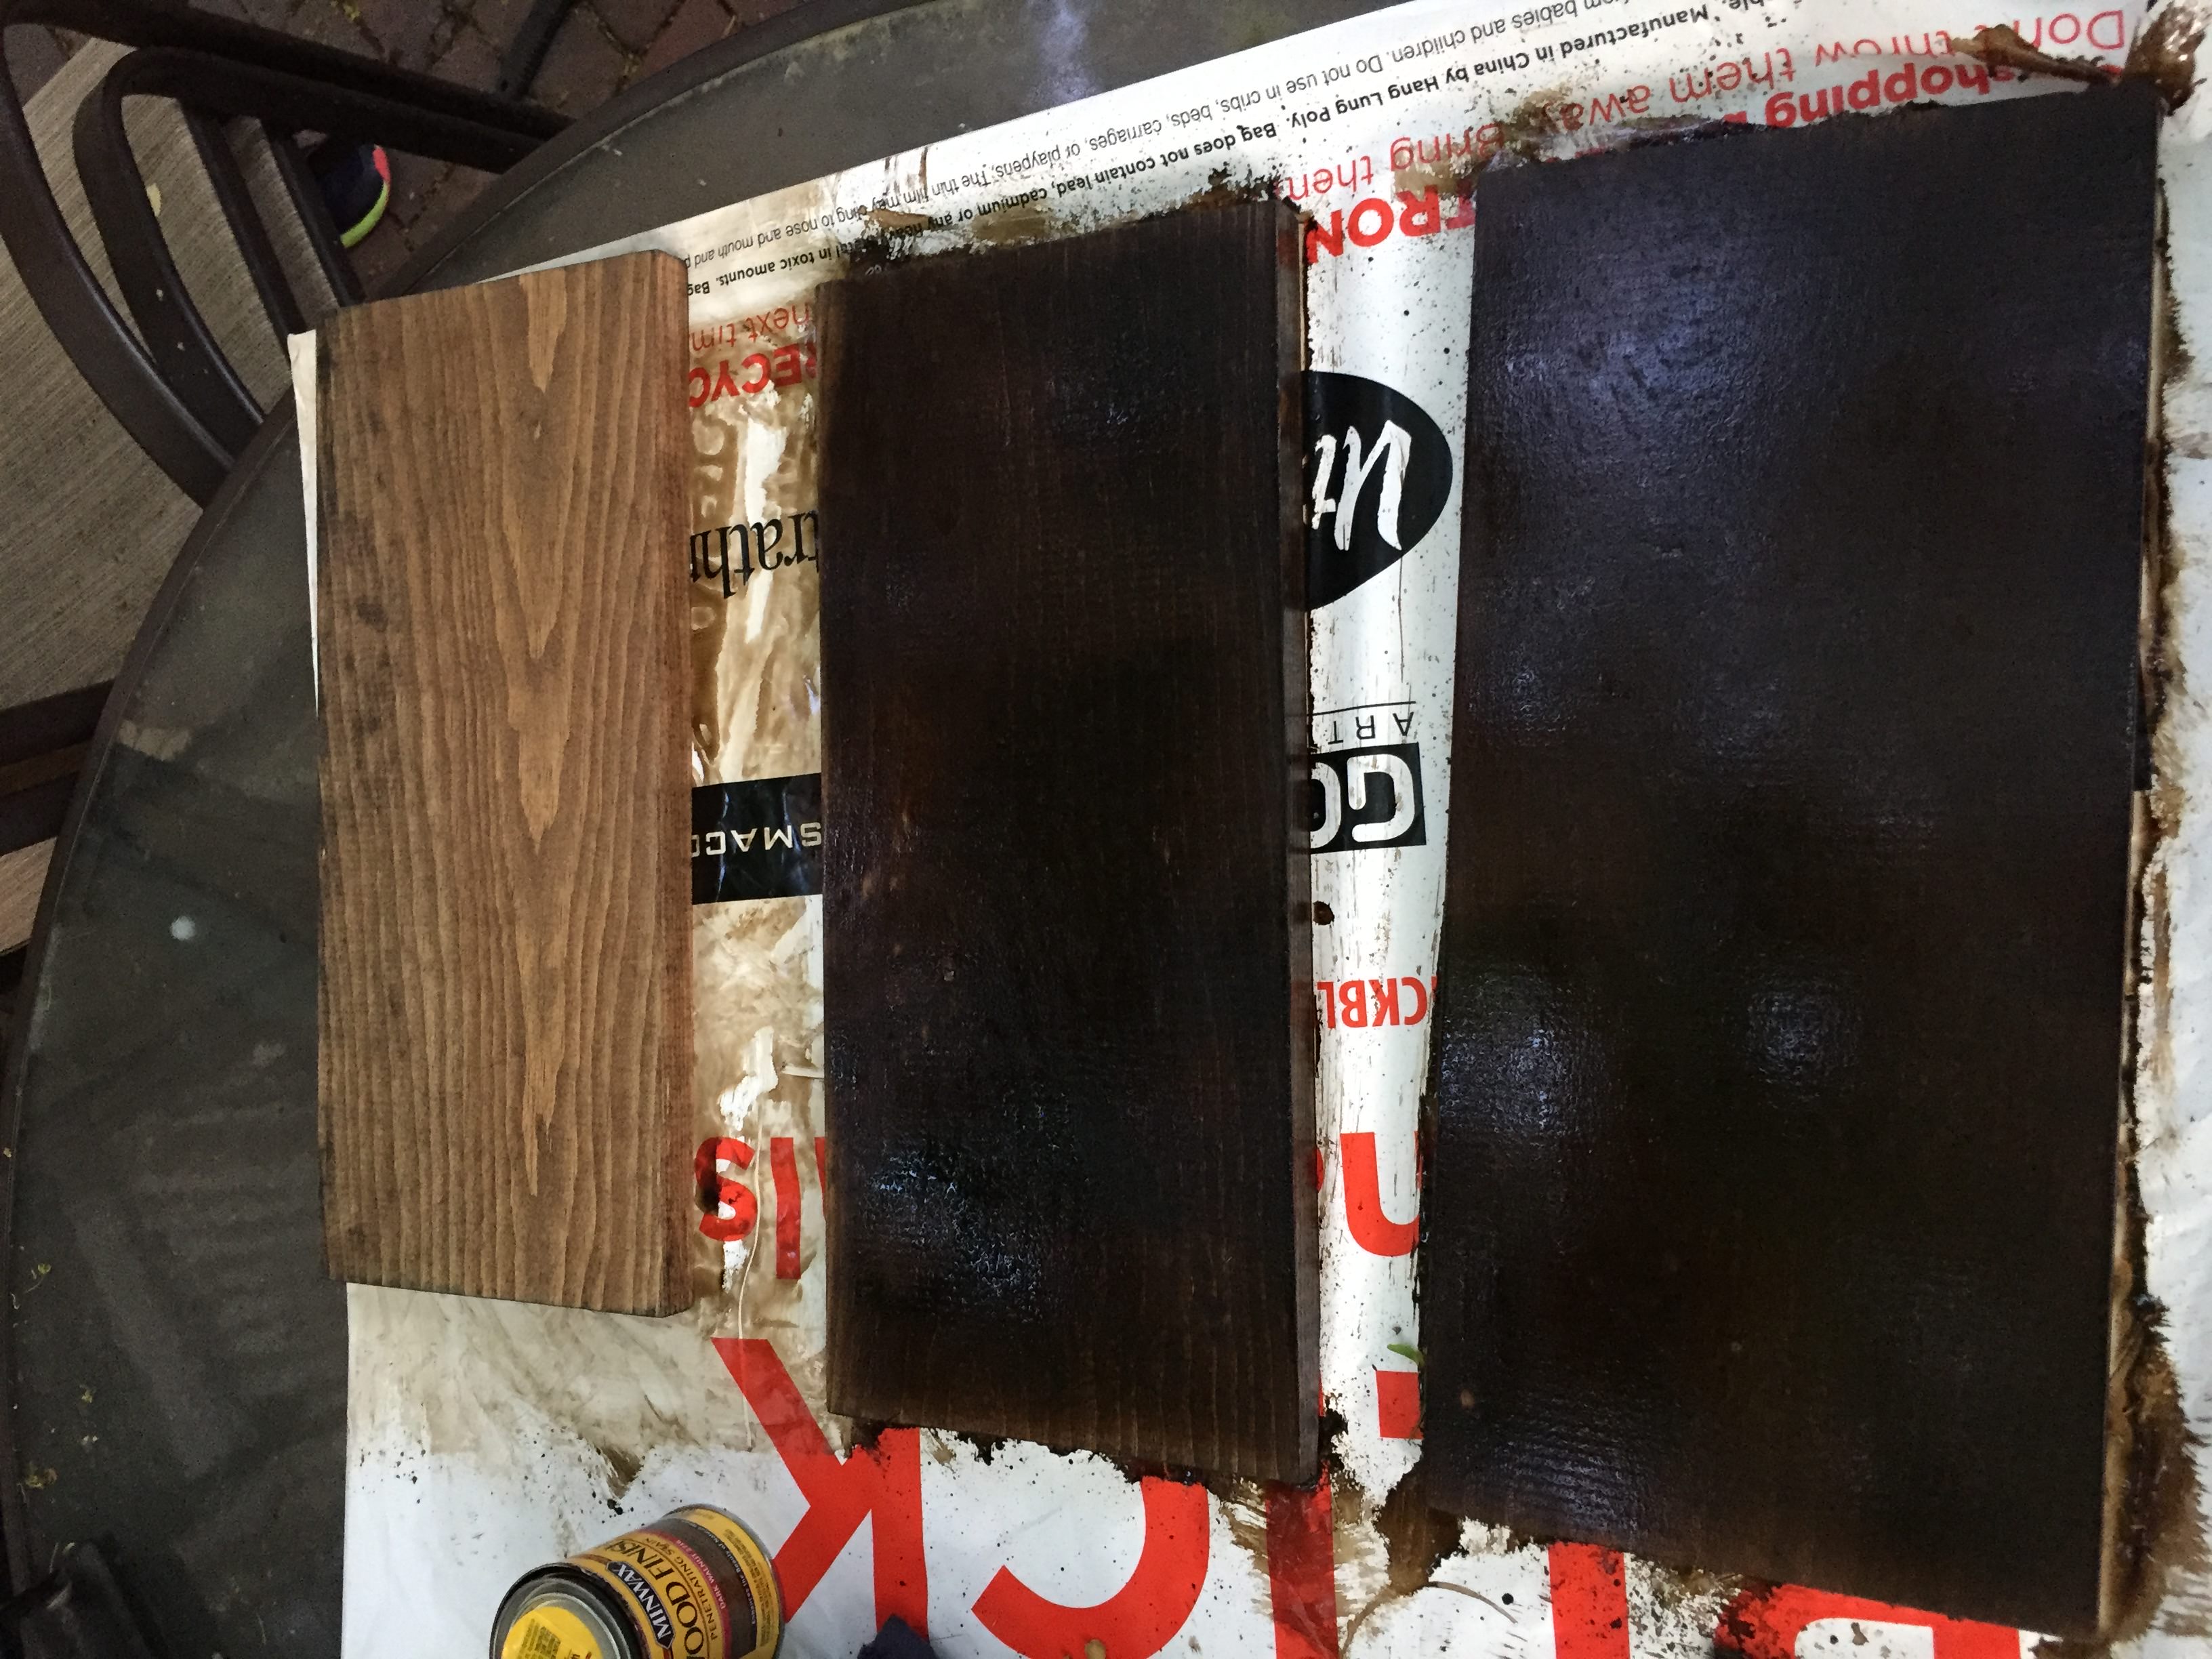
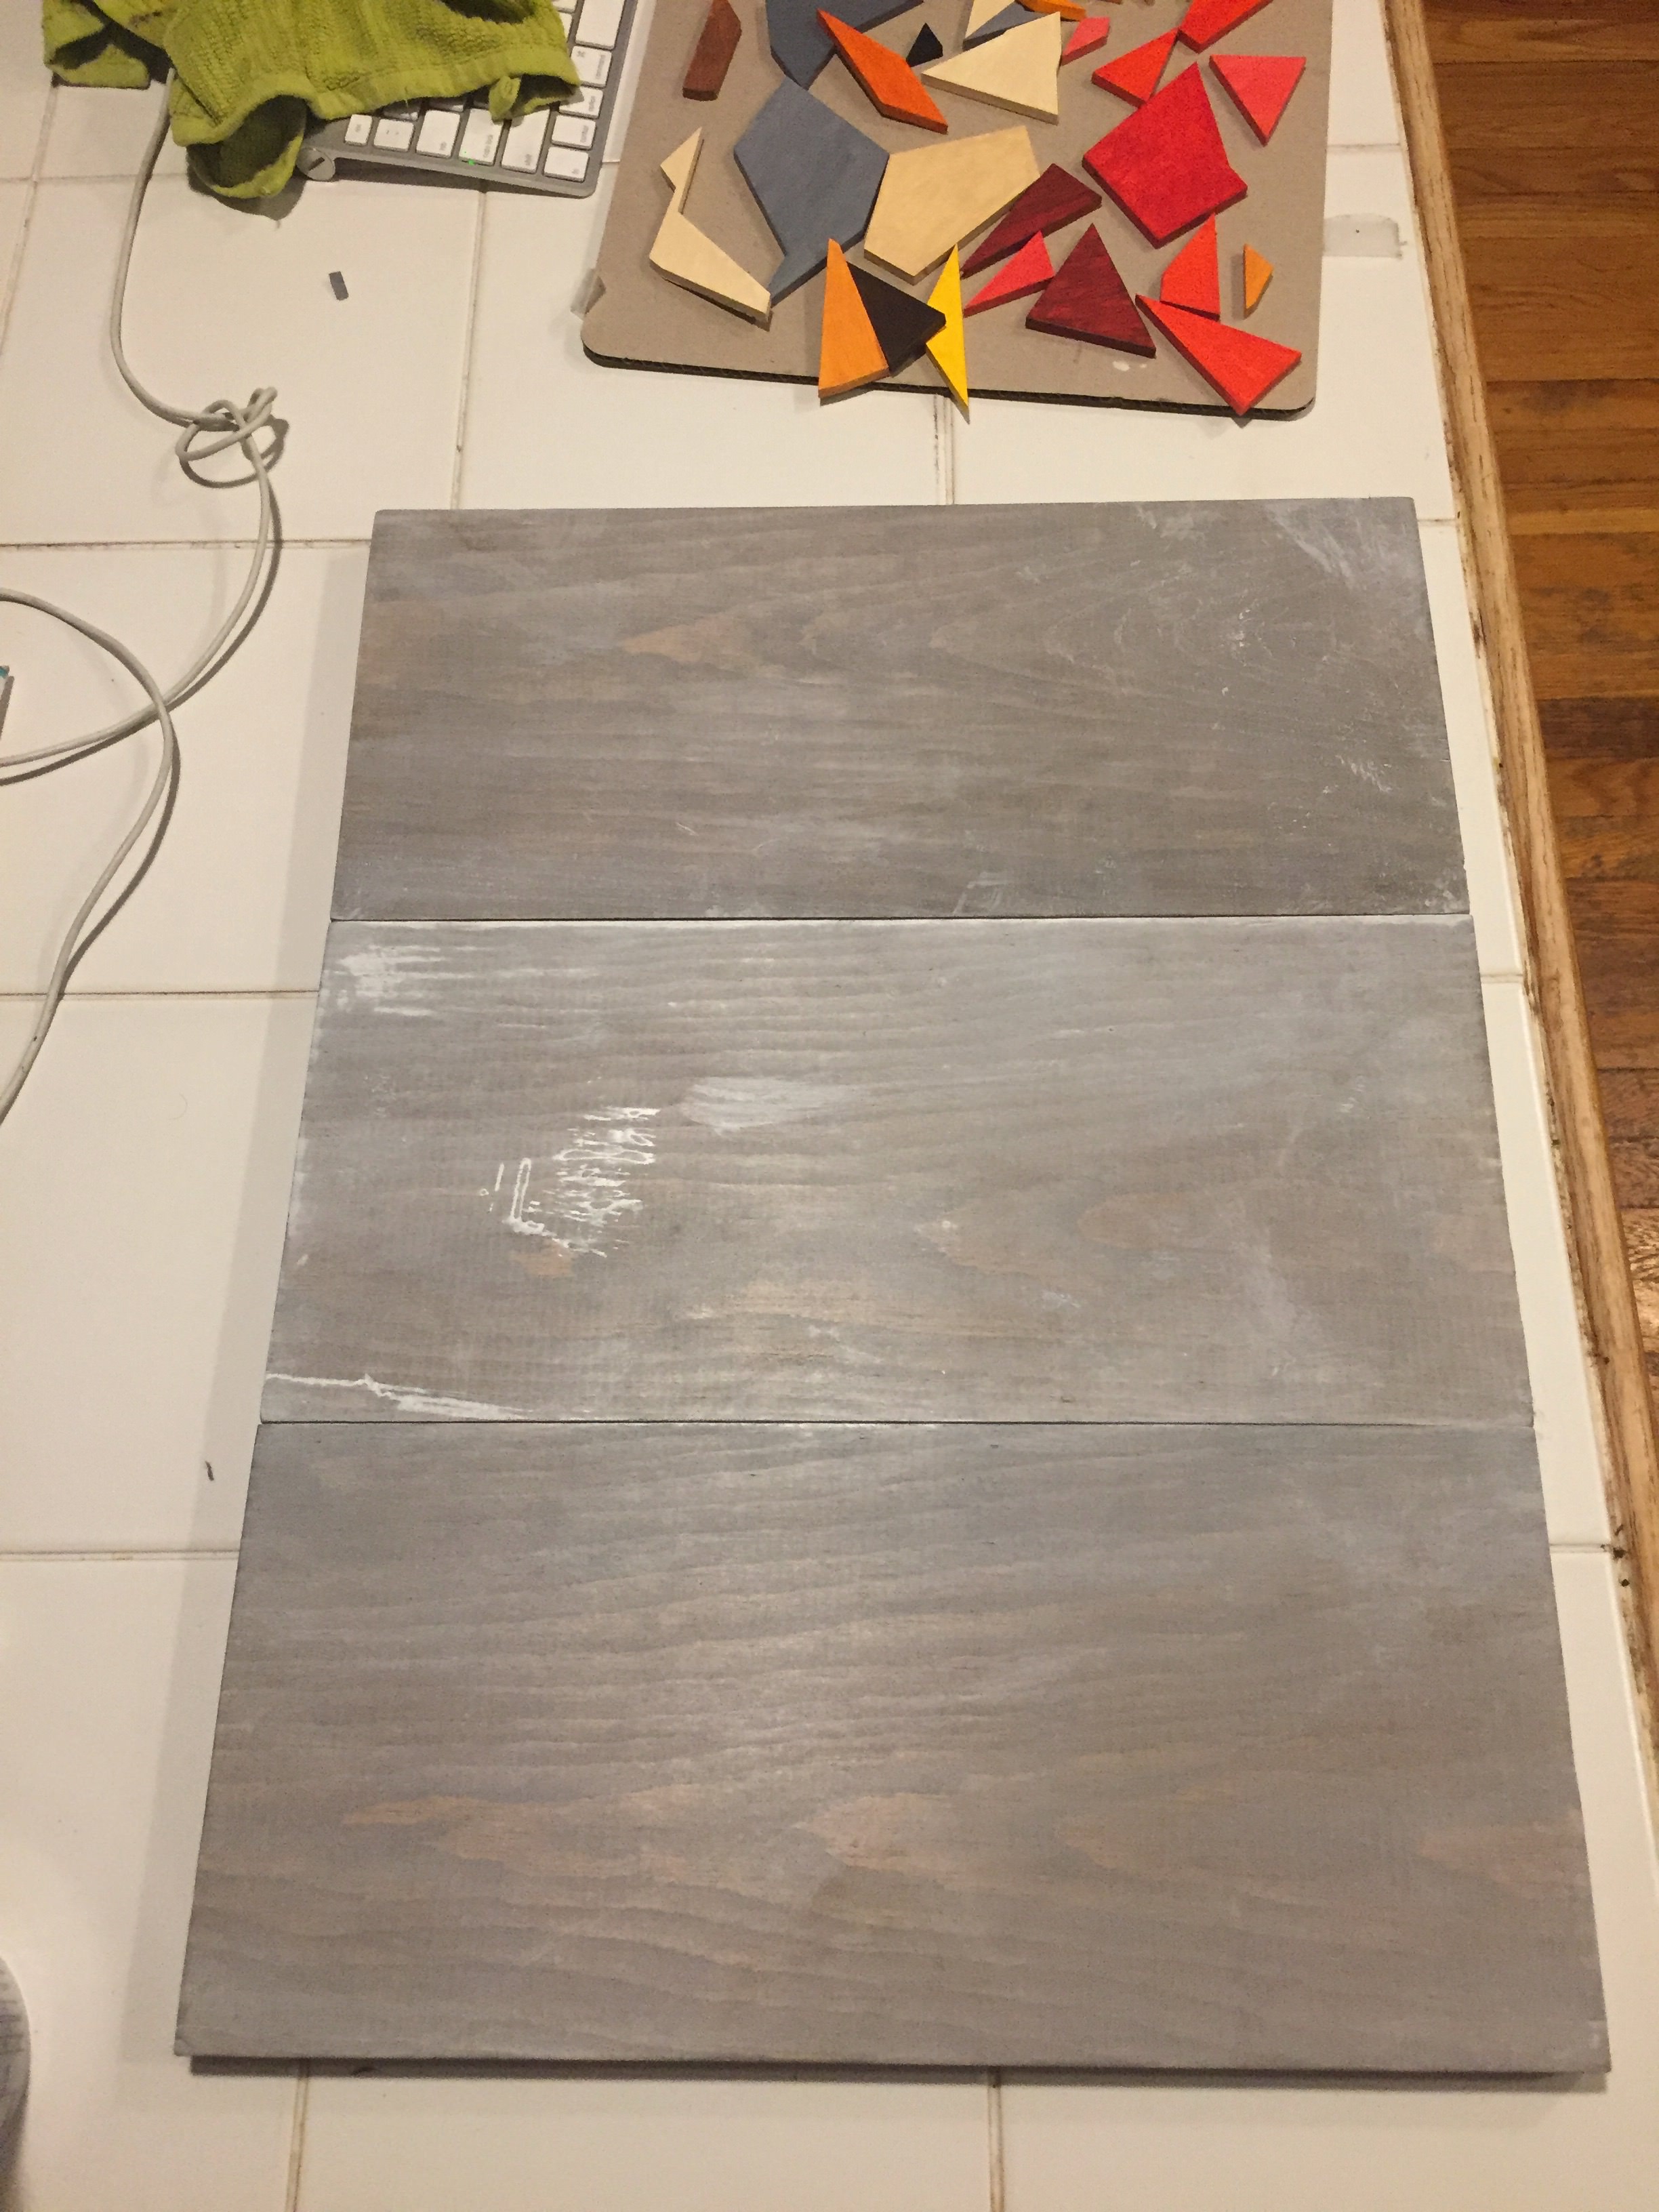
Step 4: Wooden Background
I bought a plank of common wood from Home Depot and used a circular saw to cut out three equally sized segments. After some sanding, I proceeded to stain it with a dark walnut stain and then multiple coats of a white a wash stain to give it a weathered barn look.

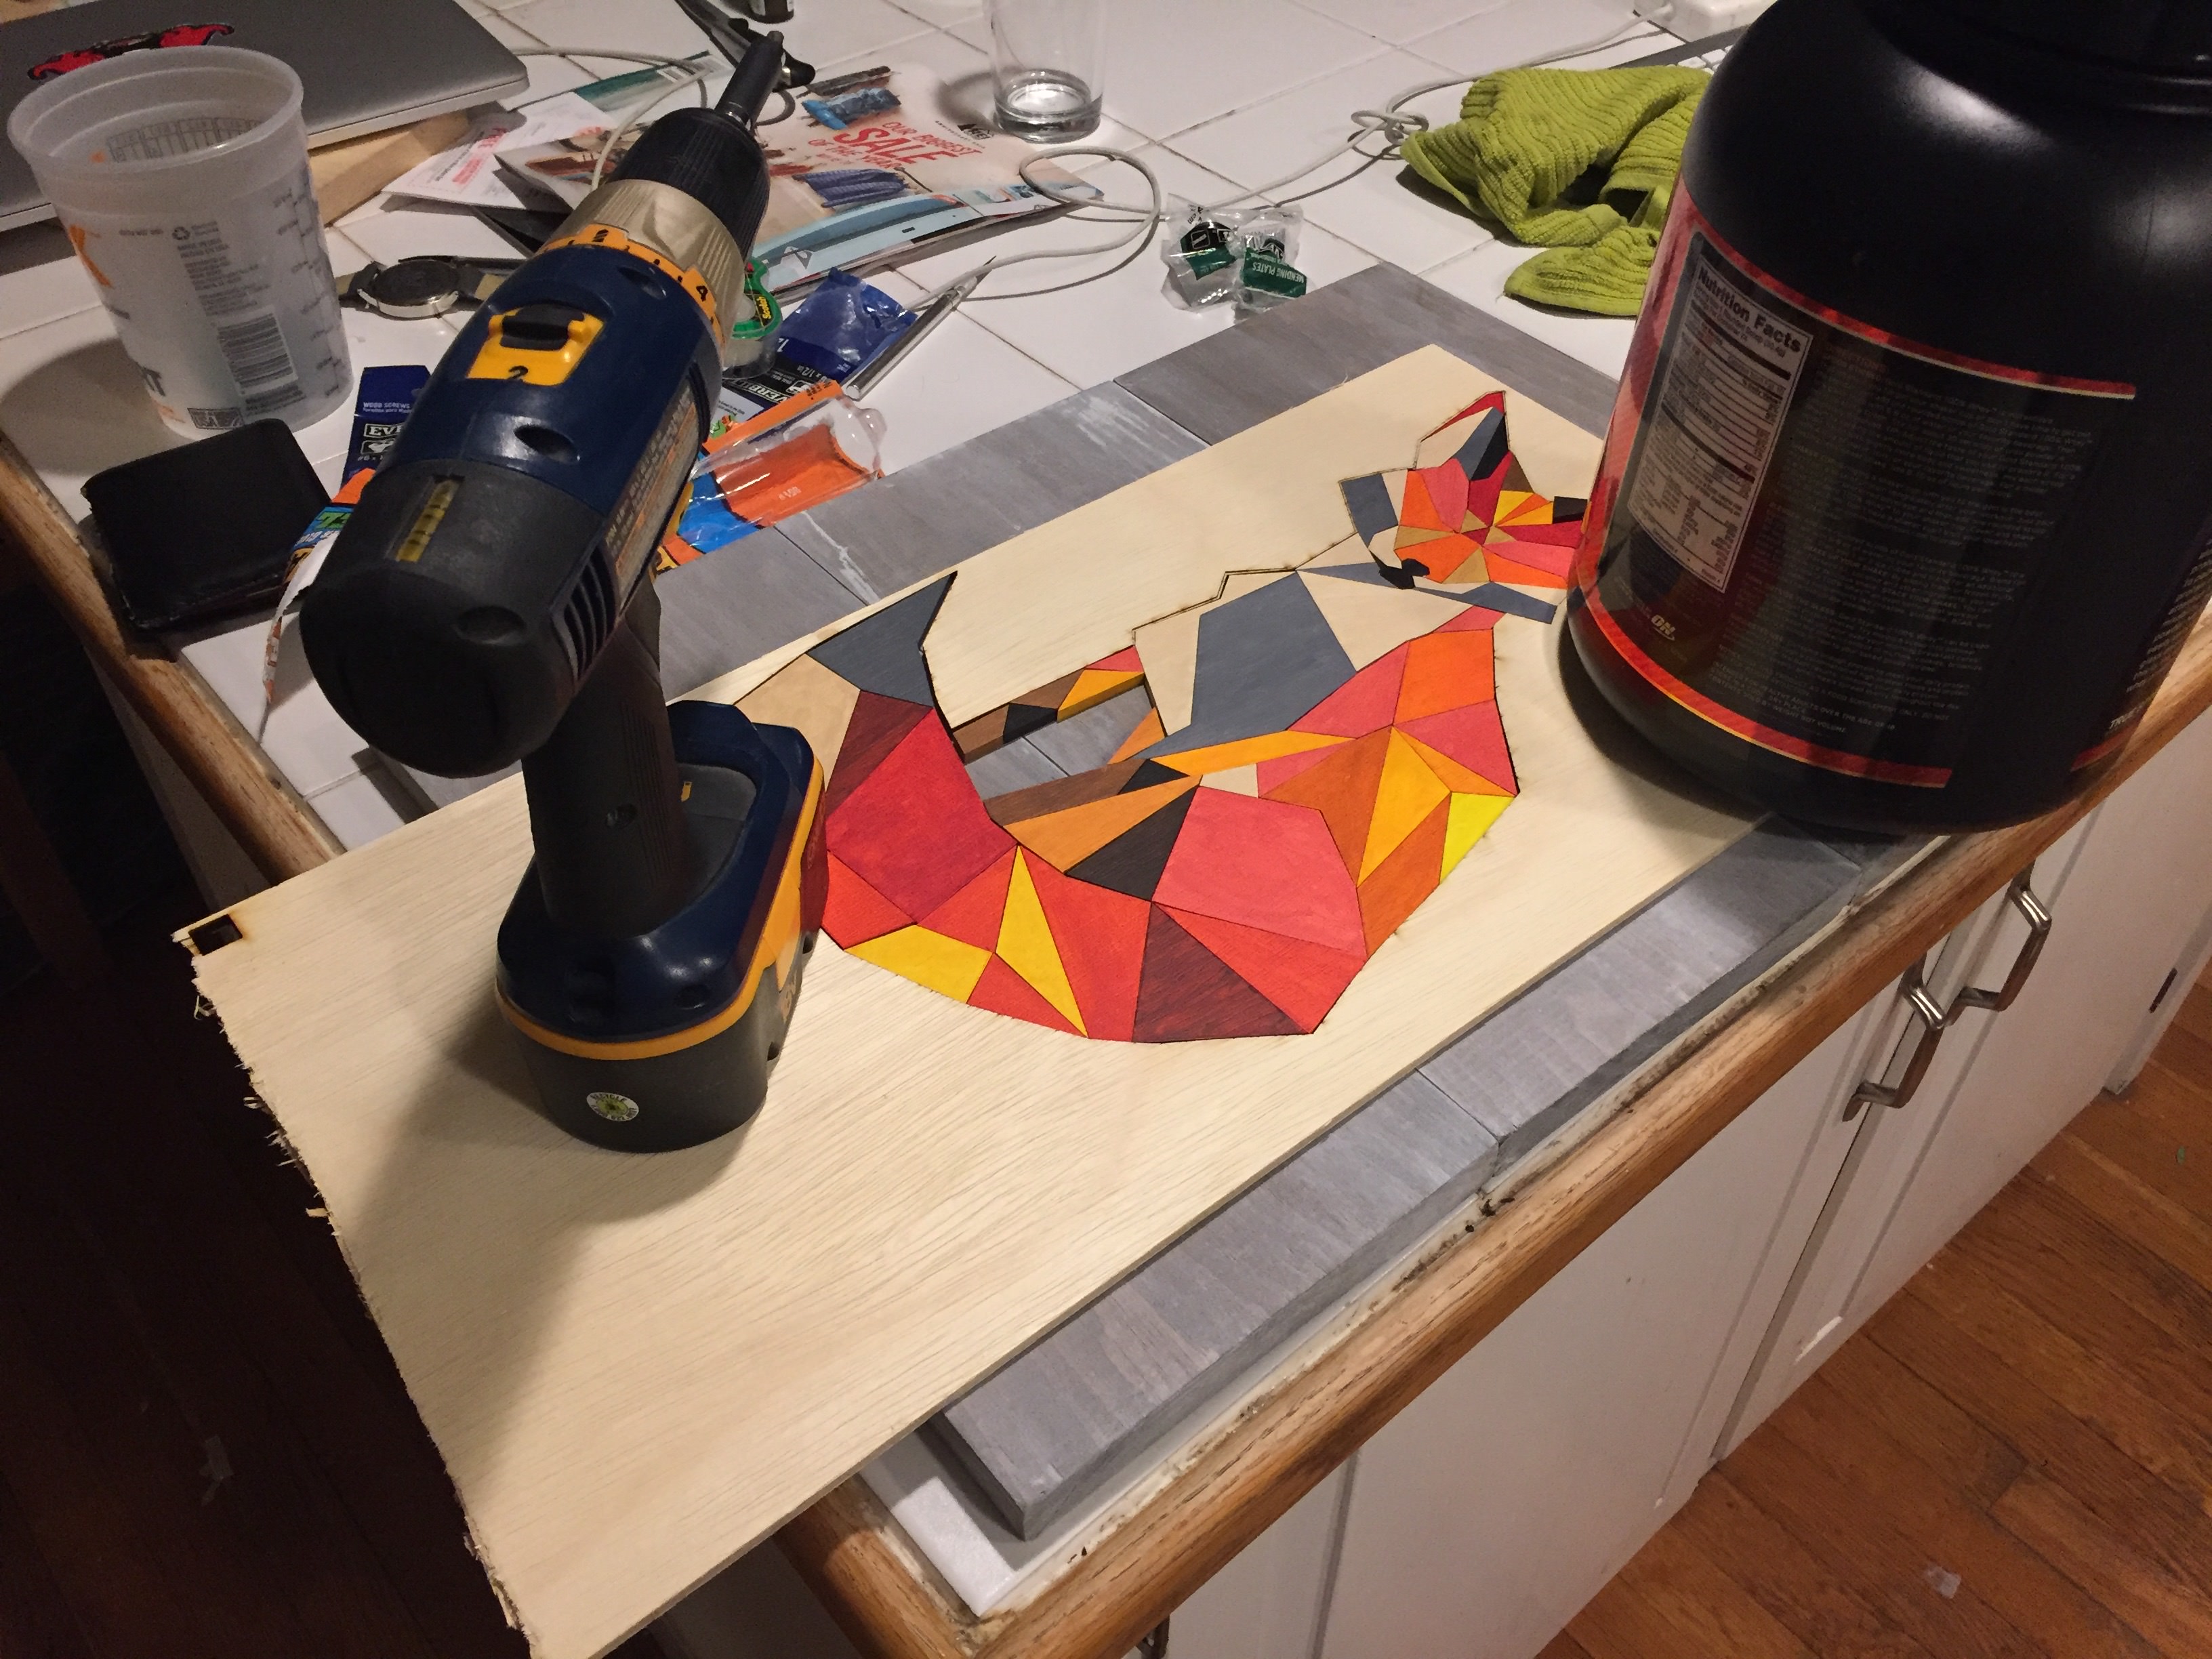
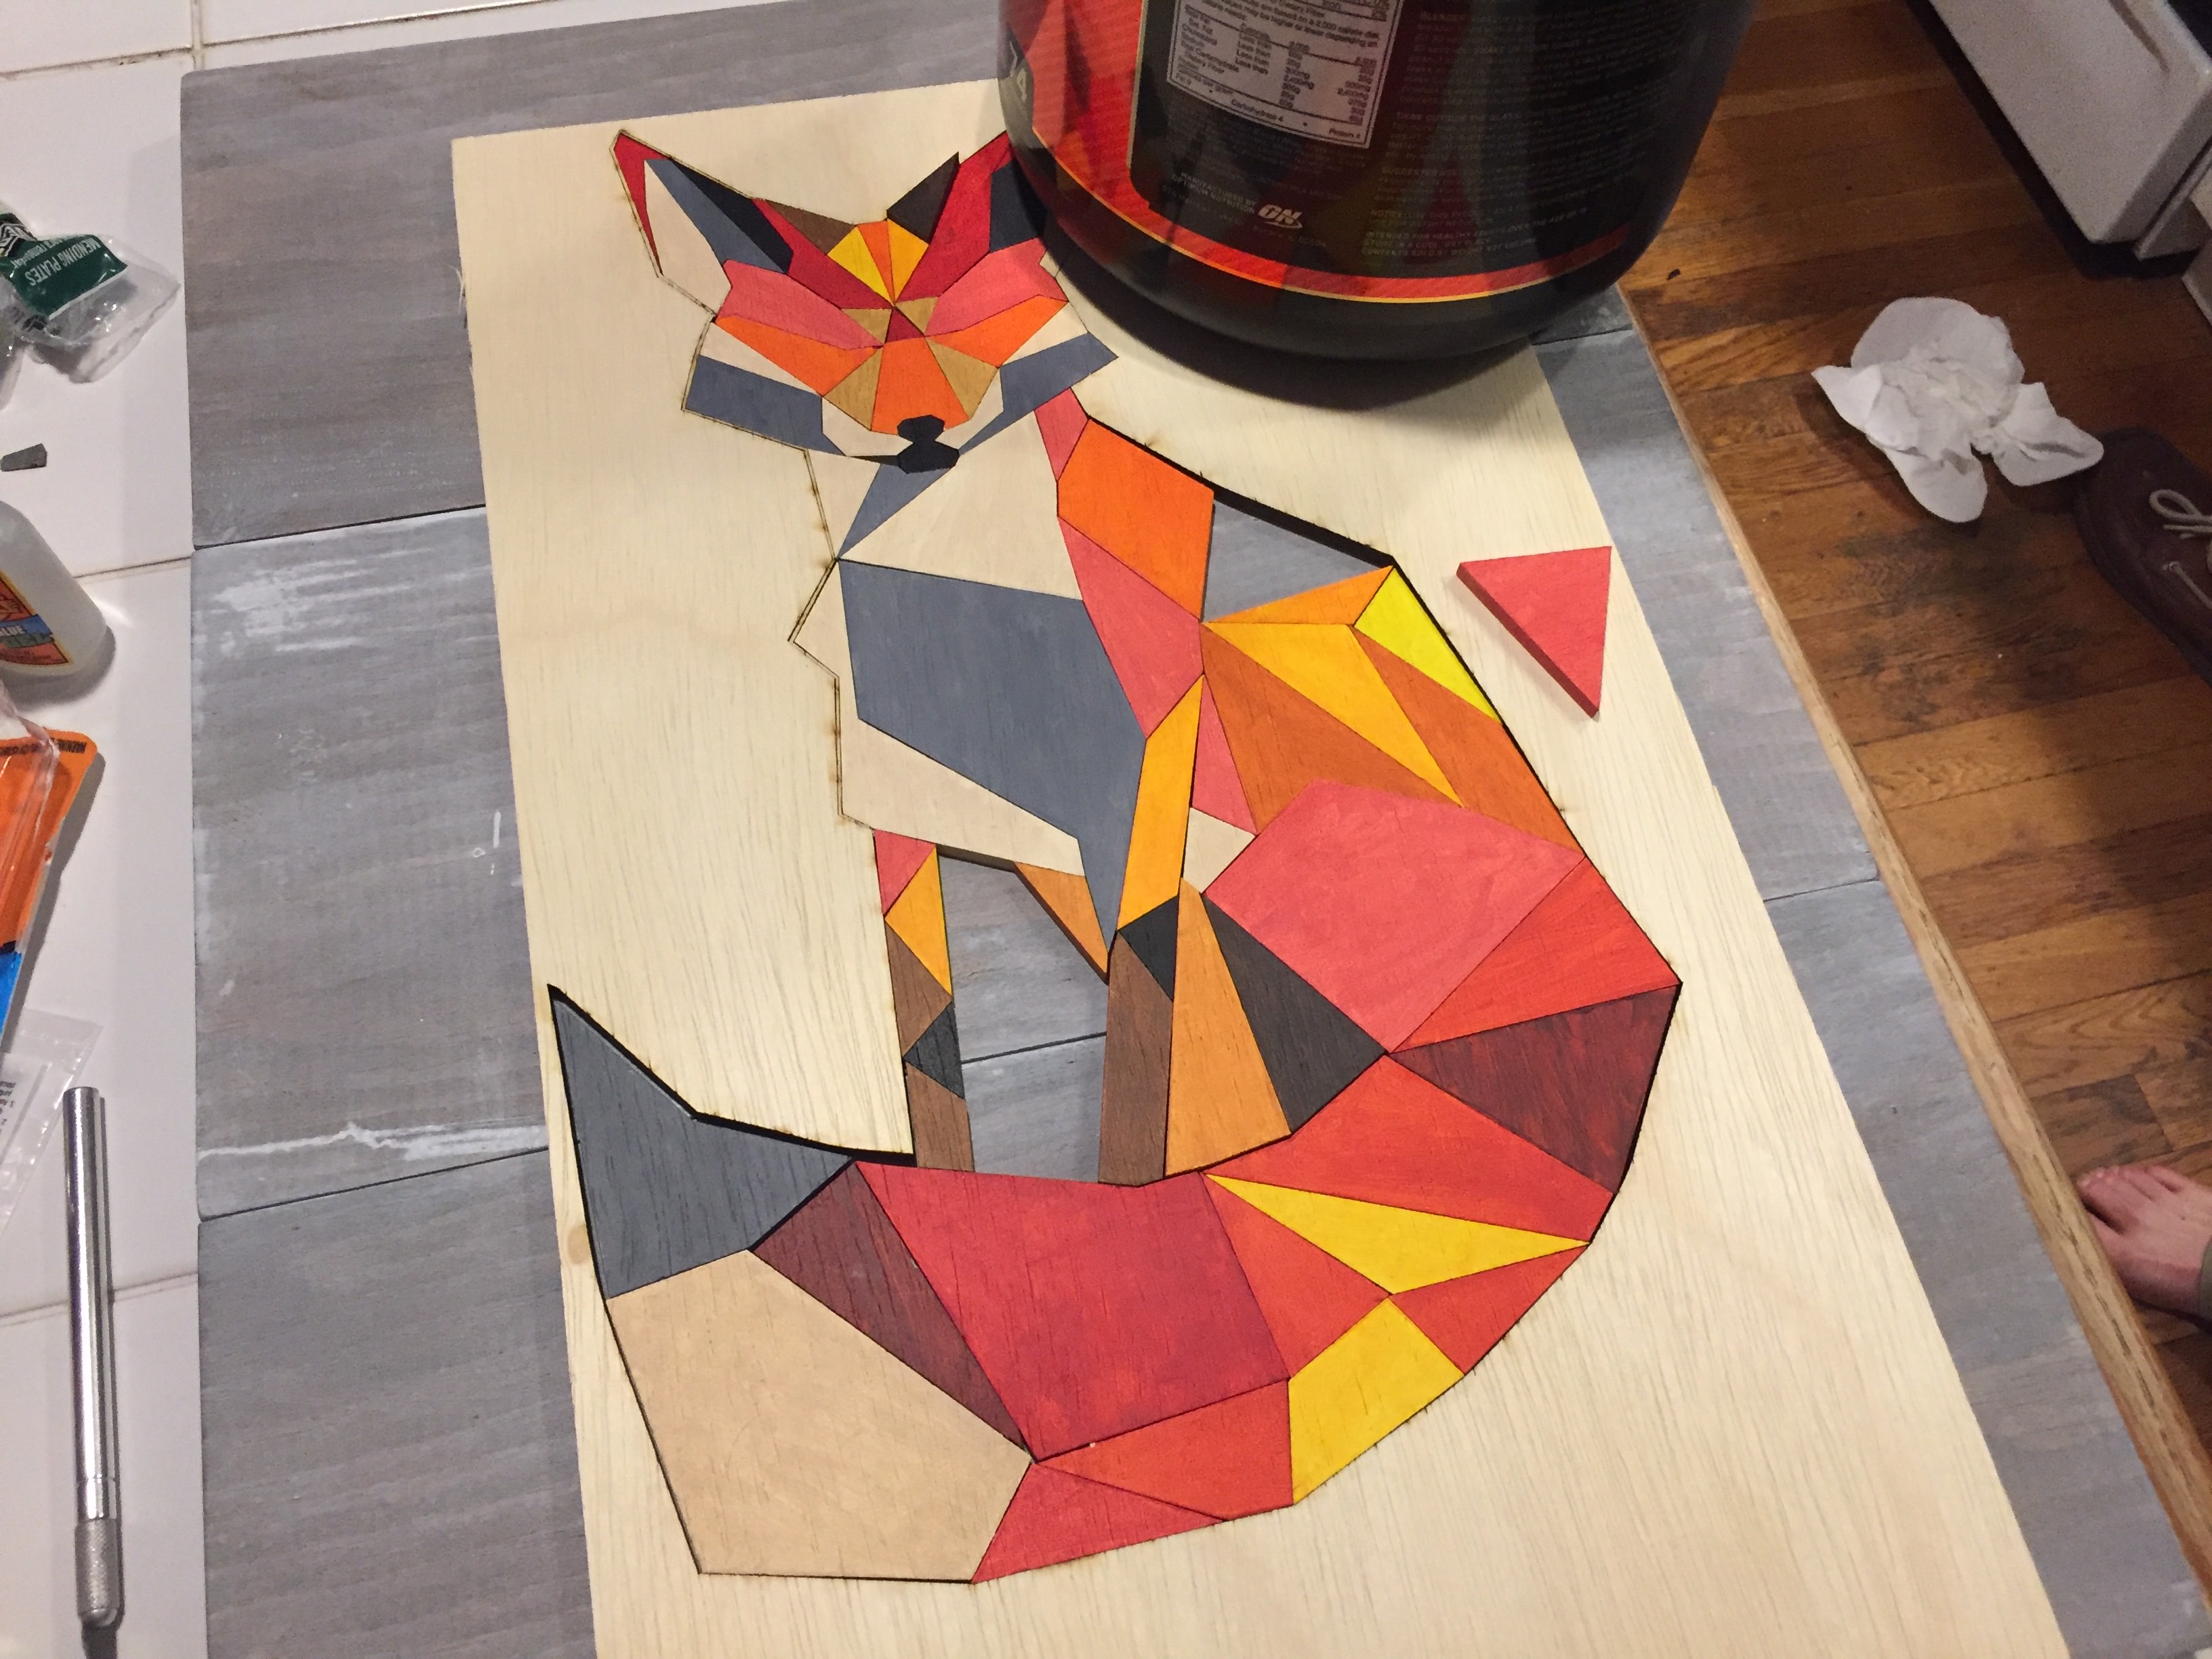
Step 5: Gluing the Fox
When I cut out the fox, I kept the original sheet of wood. I used that piece of wood as a frame to hold the individual tiles together while gluing. I went tile by tile until they were all glued to the background.
Step 6: Profit!
It's all done and looks better than I had hoped for!
© 2022 Codemang